
Raijintek is a company that makes quality cases with a budget in mind. I have reviewed two cases from Raijintek before and while the cases aren’t perfect, the are great cases for the value they are an excellent choice. Today, we will take a look at a case I’ve wanted to take a closer look at since its launch last year. We will take a good look at the Raijintek Coenus EVO Tempered Glass E-ATX case.
Features
- Tempered Glass: Tempered glass appearance design all around the case. New gaming chassis of tempered glass series for E-ATX/ATX/Micro-ATX/Mini ITX. 4.0mm Tempered glass side/front/top panels.
- New Gaming Chasis of temper glass series: Black coated interior, dust filters at front and bottom of case.
- Flexible: Compatible with 350mm long GPUs, 175mm tall CPU coolers, 20mm PSU.
- Inputs: Supports 2x USB 3.0
Case Specification
- Dimensions: (WxDxH) 235mm x 444mm x 544mm
- Weight: 11.6 kg or 16.2 lbs
- Material: SPCC, 4.0mm Tempered Glass
- Colors: Matte Black
- Motherboard Support: E-ATX, ATX, M-ATX, M-ITX
- Drive bay Storage: 4×3.5” hdd, 4X2.5” hdd/ssd
- Expansion slots: 8 PCI slots
- Power Supply: Standard ATX up to 200 mm length
- Cooling System: Rear Fan: 120 mm x 1, Top fan: 120/140 mm x 2 or 240 /280mm radiator, FrontFan: 120 mm x 3 or 140 mm x 26 or 240/280/360 radiator of 60mm thickness
- CPU Cooler Height: 175 mm
- GPU Card Length: 350 mm
- PSU Length: 200 mm
- Side panel: Steel side frame, top/side/front tempered glass panels
- Front I/O: Power button, 2 x USB 3.0, Headphone Jack, Microphone Jack
Unboxing


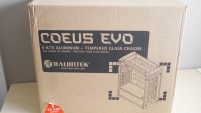
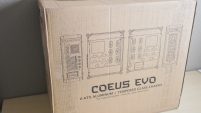
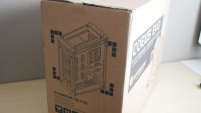
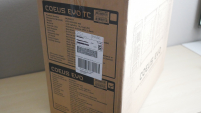
To get started let’s take a look at the front of the box. There are a small tan and black diagram of the Coeus Evo case, along with the name of the case, the company logo and a glass caution sticker on the front of the box. Looking at one of the sides you see another diagram of the case. The other side has the specifications listed. Lastly, the back of the box has 4 more diagrams of the case.


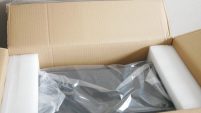
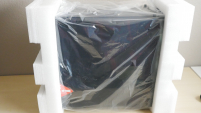
Cutting open the top of the box and you are greeted with the case wrapped in a plastic bag and secured in the box with two soft cell foam inserts.
This is great that Raijintek includes soft cell foam as it tends to cushion the case from any damage, and this is important dealing with a case that has tempered glass all around.
Since there are four tempered glass panels, they are all covered in plastic film on all sides to protect them from any scratches.
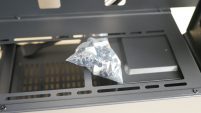
Lastly, there is a small bag included that has all of the screws that you need for the case.
A Closer Look at the Case


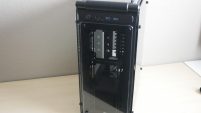
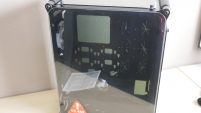
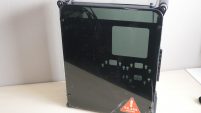
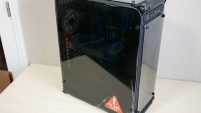
Beginning at the front of the case, you are greeted with a solid 4mm tempered glass front panel. This panel is the smallest of the tempered glass panels and is secured with four thumbscrews. The front panel does have Raijintek’s logo etched at the bottom. There is a little bit of space to be able to intake air for the three optional 120mm intake fans. An intake filter is not included for either the front intake or the top exhaust areas.
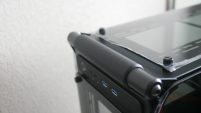
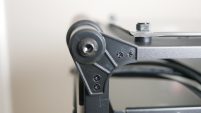
Above the tempered glass front panel is the case I/O. There is a power button, headphone and microphone jacks and two USB 3.0 ports. On all four corners of the case handle that not only act as the case feet but also handles to carry around the case. They are covered with a rubberized material that gives the case some tact to not slip out of your hands or slide around the desk.


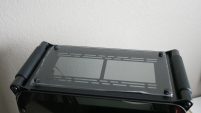
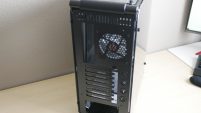
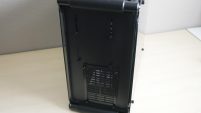
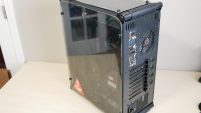
The top of the case is covered by a single piece of tempered glass and underneath the glass, the case can support two 120mm exhaust fans or radiators. The rear of the case has a ventilation grill at the top, followed by a 120mm exhaust fan, rear I/O cut out, 7 pcie expansion slots and the PSU cut out. The bottom of the case is steel with a PSU intake grill that is filtered.
Both side panels are large tempered glass pieces to show off all of your hardware inside. Make sure you have cable management in mind to add that aesthetic touch.
A Closer Look at the inside


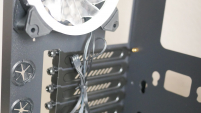
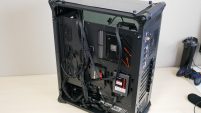
Next, we move on to taking a look behind the right-side panel. There is a large CPU cutout that will give you access to place backplates for your varies AIO CPU coolers or air coolers. There are also two spots below the cutout to install 2 x 2.5” SSDs or 2 x 3.5” HDDs. There are six grommets to be able to route all your cables to the front side of the motherboard tray and a large area above the motherboard tray to have access to any top mounted radiators, fans and also routing your EPS cable with ease. In the PSU bay, you have room for two additional HDDs or SSDs or a 120mm fan. You can fit a fairly large PSU in the bay also and remove the drive cage to leave more room for managing your PSU cables. The PSU will sit on pretty large isolator mounds to reduce any vibration. The I/O cables included with the case are black which is great because with two glass side panels, everyone will see if the cables are not sleeved. There is plenty of room behind the motherboard tray to be able to manage and route all of your cables.
The side panel once again is secured by thumbscrews and is spaced by a rubber isolator to be able to add ventilation room and make space between the metal frame and the tempered glass.


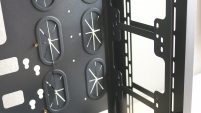
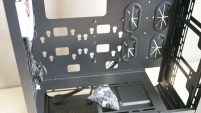

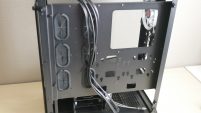
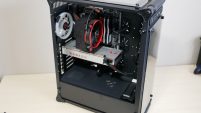
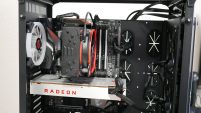
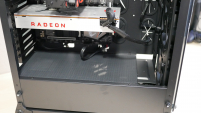
Taking a look at what is behind the left side panel, you have the main chamber of the case. You are greeted with room for 3 x 120mm fans, 2 x 140mm fans or a 240 or 360mm radiator. There is space left in front of the PSU chamber to be able to accommodate radiators installed at the front of the case. The radiators or fans can be mounted on a removable tray that makes installation a breeze.
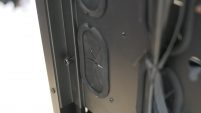
Taking a look at the PSU chamber, you can install 120mm fans if desired as there is a filtered magnetized mesh panel that sits on top of the PSU chamber.
Taking a look at the motherboard tray, you notice the previously mentioned six cable routing grommets and motherboard standoffs pre-applied for ATX, although the case can support EATX (the purpose of the 2nd set of grommets. You can also notice there are two cable routing cutouts to route your bottom motherboard cables.
At the back of the case you have your eight PCIe expansion slots and the included RGB 120mm fan.
Test System and Build Impressions
The system being put in this case is my test bench setup. It consists of the following parts:
- CPU: AMD Ryzen 7 2700x
- Motherboard: Gigabyte Aorus X470 Gaming 7 wifi
- Memory: GEIL 16gb RGB 3200 Mhz
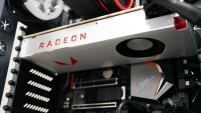
- GPU: XFX RX Vega 64
- CPU Cooler: Arctic Freezer 33 Esports One
- Storage: Seagate 500gb Sata SSD
- PSU: Corsair 1000W


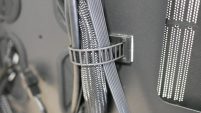
Once you remove the side, top, and front tempered glass panels, it makes it very easy to install any fans, radiators or components. The included cable ties that have 3m adhesive will allow you to manage your cables exactly how you want to. The build went together easily and looks amazing once finished. Make sure you spend a little extra time managing your cables as the two tempered glass side panels will either show off all your hard work or show that you didn’t really apply any cable management.


Raijintek Coeus Evo

- Tempered glass everywhere
- Lots of cutouts and grommets to route all your cables
- Included cable ties allow you to place and route your cables exactly where you want them
- Sturdy Construction
- Water Cooling Support
- Mounting for seven fans
- Open air feel
- Large feet/handles allow you to move the case with ease
- Wish there was a little more spacing around the tempered glass panels to allow more airflow
Overall, this is a heavy case with all of the tempered glass panels. It looks great with almost any build in side and having a tint on the glass panels will really showcase your parts if you added RGB or other lightning. The chassis is very sturdy and has a great premium feel. With all the watercooling support and room for large GPUs and CPUs allows you to build almost any rig. If you are in the market for a $150 all tempered glass case, take a look at the Raijintek Coeus Evo.


