
Antec P101 Silent
In the era of RGB and tempered glass cases, Antec is making sure to still cater to those PC builders that are looking house a NAS or builders who love silence and being able to have a lot of storage. If you are looking for a silence case or one that has a room for all your storage drives, look no further than the Antec P101 Silence.
- Thick sound dampening foam
- Flexibility to be able to remove sleds for increased airflow
- Plenty of storage drives
- Lots of cut outs
- Great black and white aesthetic
Antec has been well-known for its power supplies and PC cases for many years. I remember the first computer case I ever owned, It was a refresh of the famous Antec 300, the Antec 302. It was a great case and lasted several years and iterations for me.
With all the tempered glass and RGB PC cases that have been coming out as of late, Antec decided to take an interesting approach to cater to individuals that don’t need all that bling.
Today we will take a closer look at the Antec P101 Silent ATX Case.
Antec P101 Silent Features
- Anti-Noise Panels: The P101 Silent is engineered for silence with sound-dampening foam lining the top, front and side panels.
- I/O Panel: The P101 Silent has 2 x USB 2.0 and 2 x USB 3.0 ports that are white LED lit to make them highly visible and no more blur in the dark.
- Supports up to 11 Storage Drives: 1 x 5.25” bay, 8 x 3.5” or 2.5” trays and 2 x 2.5” ssd mounts on the back of the motherboard tray.
- Cooling Fan Support: Room for 3 x 120mm or 2 x 140mm fans in the front or a 360mm radiator, a 120mm or 140mm fan at the rear.
Extra Features:
- Minimal, Elegant Silhouette fit for any environment: Distinctive white and black color scheme with potential for customization
- Dust Filters (Front and Bottom): Easy to clean and remove
- PSU can be installed from the rear: Optimized for an efficient, easy building experience
- Snap-on Side Panel: Make your PC build more trouble-free
- Designed location for PSU: Equipped with dust-free PSU cover to create an ideal environment for your PSU.
Antec P101 Silent Specification
- Dimensions: (WxDxH) 232 mm x 527 mm x 506 mm
- Weight: 11.82 KG
- Material: 0.8 mm SPCC+ Plastic
- Colors: Black
- Motherboard Support: E-ATX, ATX, M-ATX, M-ITX
- Drive bay Storage: 1×5.25”, 8X3.5” hdd, 2X2.5” hdd/ssd
- Expansion slots: 8 PCI slots
- Power Supply: Standard ATX up to 290 mm length
- Cooling System: Rear Fan: 120 mm x 1 (pre-installed) or 140mm , Front fan: 120 mm x 3 (pre-installed) or 360 mm radiator
- CPU Cooler Height: 180 mm
- GPU Card Length: 450 mm w/o HDD tray or 270mm w/HDD tray
- PSU Length: 290 mm
- Side panel: Steel w/sound dampening material
- Top I/O: 2 x USB 3.0, 2 x USB 2.0 Headphone Jack, Microphone Jack, Power, Reset, Fan Speed Contoller
Unboxing
To start the most important part of this review, we will begin with taking a look at the exterior of the case box, then examine the case exterior and, finally, the inside of the case.


The back of the Antec P101 Silence, aka “The Silent Guardian”, has an expanded diagram with different case features. There is also a narrative talking about the case and some listed features about the appearance, air cooling capabilities, water cooling capabilities and functionality of the case. One of the box’s side panels lists all of the specifications about the case, while the front of the box only has the product name and picture of the case.


Once we open up the top of the box, we notice that Antec chose to use hard cell foam to secure the case. While the hard cell foam is functional, I wish Antec used soft cell foam to have more peace of mind if shipping this case with a full build inside. Antec did use a dual walled cardboard box to make the box, which decreases the chances of your case and any contents inside being damaged.
The case is also covered in a plastic bag to protect the exterior from any scratches during handling. Lastly, there is a card on top that the case uses a ball and socket to secure the side panels and rather than pulling back on the side panels to open the case, you should pull the side panel out and away from the case. The ball and socket is a pretty premium feature as it securely fastens the side panel to the case rather than sliding onto the case.
A Closer Look at the Case


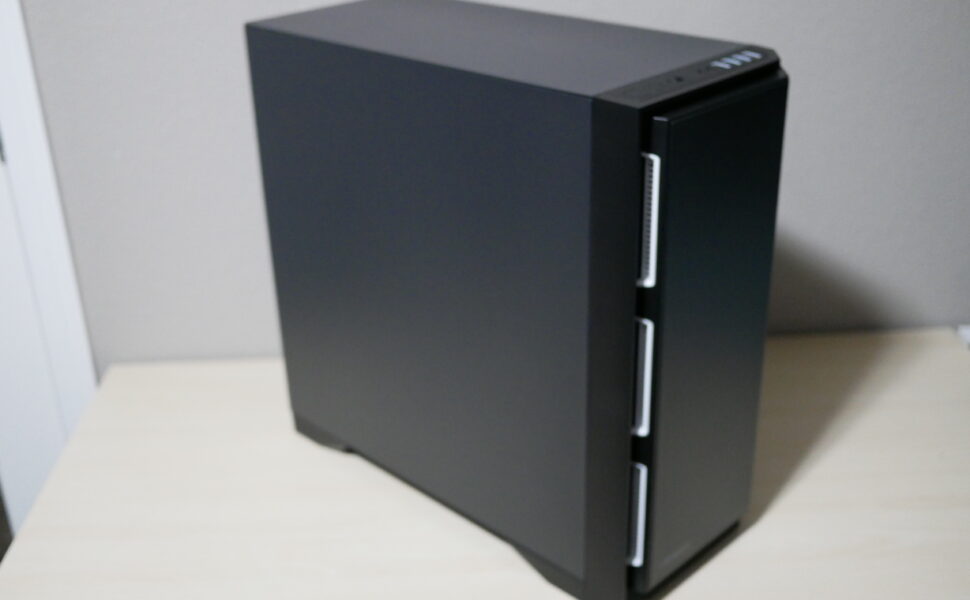
Before moving on to the inside of the case next, we will explore the case’s exterior. Looking at the right-side panel, it is a solid steel panel with no windows. The left side panel also is solid steel with no windows. The purpose of this case is not to showcase the parts that you have inside the case, and it is designed to intake air through the front, exhaust it out the rear of the case and accomplish this while being as silent as possible.


The front of the case has a plastic door that hides the front intake fans. The fans intake air through ventilation holes on the left side of the front door. The ventilation pieces are painted white to add to the dual color scheme of this case. The rest of the front door is solid black with the Antec logo in the bottom left corner. Behind the front door is a clipped fan filter, reducing the amount of dust in intake through the three 120mm fans upfront.


On top of the case, you find the front I/O panel with a large power button, a smaller reset button, a small fan control switch, HD audio ports, 2 USB 2.0 ports and 2 USB 3.0 ports. The rest of the top of the case is just a solid steel panel.
The rear of the case has mounts for a 120 mm or 140mm fan that can be moved to make room for any clearance issues. Then there is your rear I/O cutout, your 8 PCI slots that are painted black and white and lastly, your PSU bracket.


The bottom of the case is pretty plain, with a large clipped in dust filter to make sure the PSU is intaking clean air along with a bottom fan if you choose to install one.
The large plastic case feet elevate the case to give a lot of breathing room to the PSU.
A Closer Look at the inside


Removing the right-side panel, you are greeted with a white motherboard tray with several cut-outs up from route cables to the multiple SSDs or HDDs if you install them inside the case. The front I/O cables are neatly routed from the front of the case down to the bottom of the case to get them where they need to go. Next, there is a large CPU cut out to install a CPU backplate with ease. Below the CPU cut out is a sledge to secure two SSDs. The backside of the motherboard tray has grommets covering the cutouts, and there are plenty of tie points to secure your cables in an orderly fashion. The bottom PSU area is large to hold all your PSU cables, even the unused ones if you have a non-modular PSU. There are also small foam isolation pads to dampen any vibration coming from your PSU. Lastly, Antec left lots of room behind the motherboard tray to hold all your cables, and this is needed because the side panel is just a solid steel piece with sound dampening foam.
Moving on to the main chamber, you are greeted with a continuation of the white and black theme. Behind the 3 x 120mm fans that intake fresh air, you are greeted with 4 x 2 sledge 3.5” or 2.5” drive caddies. They are grouped in pairs that allow you to remove the ones you don’t need and clear up the airflow path.
The sledge holders do have cutouts to allow some airflow to continue to the main chamber. Above the drive sledges is an 5.25” drive bay for those that still would like to install a DVD drive or Blu-ray drive.


The PSU shroud has two cutouts adjacent to the motherboard tray cutouts, which is great because if you have a motherboard that blocks the top cutouts, you can route the cables through the PSU shroud. Again, this is nice attention to detail by Antec.
The cable routing cutouts are positioned perfectly around the motherboard tray, and you should not have any difficulty getting your cables where they need to go. The rear of the case has a 120mm fan mounted.
Another attention to detail worth noting is that Antec has placed their logo on the front of the case, on each case foot, and even on each drive sledge. So you definitely know it’s an Antec case.


The accessories box has many screws needed for the case, a few small cable ties and an instruction manual.
Build Impressions
I did not have lots of spare parts available to do a full build, but I was able to install several parts in the case to sample a potential build and visually see clearances. The following parts were installed:
Motherboard: Gigabyte X370
Memory: Gskill Ripjaws V 16GB 3200 MHz
GPU: XFX RX Vega 64


Installing the components above was a breeze. With all the provided screws, I was able to install the motherboard easily. As you can see, even with all the drive sledges installed, there is plenty of room for a large GPU. As previously mentioned, there are plenty of grommets/cutouts located all around the motherboard to route cables nicely. With all the sound dampening foam, this case will definitely be able to silence almost any build.


