The Ultimate Guide to Custom Watercooling your PC
Custom Watercooling your PC can be a gratifying experience not only for your self-confidence but also increases the longevity of your overclocked components but sometimes you can be left wondering, s it worth watercooling my pc?.
Until last month, I ran the same CPU and motherboard while compiling development code and playing games for a little under four years continuously. The only reason I could do that was because of my custom water cooling loop – I didn’t even change the coolant once in that time.
Table of Contents
- 1 What is Watercooling and Why is it Better Than Air?
- 2 The Absolute Basics: Watercooling Components
- 3 Custom Watercooling Build Tips
-
4 Custom PC Watercooling: Putting it all together
- 4.1 Step One: Assemble Blocks & Add Fittings
- 4.2 Step Two: Attach Cooling Blocks
- 4.3 Step Three: Mount the Radiator
- 4.4 Step Four: Install the reservoir & Pump
- 4.5 Step Five: Install Components into the Case
- 4.6 Step Six: Cutting Tubing to Size and Fasten in Place
- 4.7 Step Seven: Bleed & Leak Test
- 4.8 Step Eight: Final Build
Watercooling is a form of extreme pc cooling which started because of enthusiasts constant need for more speed. Overclocking became mainstream when bios based overclocking becoming the norm over jumper-based configurations, things exploded. However, as with all technology advancements, heat soon became an issue bringing with it the need for bigger and more efficient coolers.
When processors started pumping out more heat and stock coolers struggled to cool them (cough P4 HTT Chips) along came consumer heat-pipes, Peltier, water cooling, sub-zero phase change units and liquid nitrogen cooling.
Over the course of this stupidly long guide, you will become a water cooling master. Armed with enough information to make an informed decision on the components you will need to buy to water cool your gaming PC and even how to avoid common problems.
Lets start with watercooling for beginners.
What is Watercooling and Why is it Better Than Air?
Watercooling is used to keep components cooler than traditional air-based solutions. Consisting of primarily a CPU block, water pump, reservoir and radiator, watercooling is a form of extreme PC cooling that carries heat away from components more efficiently than air.
The cooling power of a particular water cooling loop is always dependent on its parts. If you have been planning to use a small 120mm radiator with some spare fans you have in the cupboard, then you might be better of spending the money on a quality air HSF rather than investing in liquid cooling.
If you plan on overclocking your pc, the absolute minimum radiator size, I would recommend a 240mm and some high static pressure fans even if you plan to buy an AIO CPU cooler.
Related: The Best AIO: Corsair H80 vs H110 GT vs Fractal Kelvin S36
All-in-one Watercooling vs Custom Build?
Closed-loop vs custom build PC water cooling is not a straightforward question to answer and comes down to how far you want to push your system and also your budget for watercooling.
If you are serious about looks, overclocking and pushing your computer to its absolute limits, then consider a custom water cooling loop. For an extra $50 and some scouring around on eBay, you can easily get together an excellent cooling loop capable of pushing your chip to its limits this side of phase-change or liquid nitrogen.
The problem with an all-in-one CPU cooler is that most of the pumps are just not very powerful. They come built into the CPU block, providing low flow through the loop. If you have limited funds and can’t afford to go custom then check out Fractal Design’s Kelvin S36 AIO CPU Cooler.
Bonus: The Best AIO: Corsair H80 vs H110 GT vs Fractal Kelvin S36
The Absolute Basics: Watercooling Components
There is a famous saying that a building without a solid foundation cannot stand, and the same is true for your water cooling loop. Choosing the right parts is crucial to the success of your build and overclocking efforts.
CPU / GPU / RAM Cooling Blocks
Primarily constructed of copper (sometimes silver), they sit on your components drawing heat away. CPU, GPU, RAM and Motherboard blocks are doing the brunt of the work in the loop of drawing the heat away from your components to your radiators.
Over the years of building and hundreds of hours spent on forums, one thing I have consistently read is you should never mix metals. They can react with each other causing galvanic corrosion, while it’s not a huge problem with modern loops you should definitely learn a little about it..
Galvanic corrosion is an electrochemical process in which one metal corrodes preferentially to another when both metals are in electrical contact, in the presence of an electrolyte. This same galvanic reaction is exploited in primary batteries to generate an electrical voltage.
wiki
The result of galvanic corrosion in a water cooling loop can be devastating, causing irreversible damage to your water cooling loop and your PC components.
Top Tip: Mounting your blocks at different orientations can yield better results on some CPUs, find out more here
When choosing multiple water-blocks, make sure to do some research – one thing that is bad in any water cooling system is restriction. It is important to make sure they are not overly restrictive as heat will stagnate, hanging around for longer and driving temperatures up throughout the loop.
Pump
The pump is one of the most crucial parts of any solid build, there are lots on the market, but over the years, a couple of specific pumps have stood out from the crowd, consistently performing above the rest.
My first ever pump I purchased was over 12 years ago at the tender age of 16. It was a Swiftech MCP655 and performed graciously. It was a powerful pump capable of cooling my Pentium 4 /w HTT to a beautiful POST @ 5Ghz; the pump lasted for eight years before it finally died, and I had to replace it. I didn’t even think twice before ordering another one; I went with the variable speed that allows you to crank up the water flow one step further.
Depending on your case there are a couple solid pump choices, I will list them from best to worse:
- MCP655 / D5 Pump
The pump I am currently using. It is a straight copy of Switches early MCP655 but comes with variable pump speed, allowing you to crank the flow up and down to fit your needs.
Most people replace the moulded pump casing with a built-in reservoir as it’s quite bulky and can be hard to get into your case without causing kinks in the case. overall this is the best pump money can buy for a custom loop. - Swiftech MCP355
Swiftech really dominates the pump market. The MCP355 is a surprisingly small unit, perfect for cases with little space. Just because it is small does not mean it is not powerful, providing solid flow throughout. While I have not personally owned one before, I know plenty of people who have, and they all say it’s a great pump.
Update: I have since invested in a EKWB dual DDC 3.2 PWM pump. It’s great to run them at near silent operating speeds and still maintain a very competitive 24/7 overclock. The added security of have a redundant pump sweetens the deal making sure that if one pump dies, the rest of the system won’t overheat and die.
Radiator
The second most important part of your custom build and also the part responsible for dissipating all that heat. While *most* radiators perform perfectly good, there are a few things you need to look out for when buying your radiator.
- FPI – Fins per inch
- Size / Thickness
- Type of metal
FPI or ‘Fins Per Inch’ is one of the things you need to be looking out for when selecting your radiator. Size does play a big role in any radiator’s cooling efficiency, but fin density is equally, if not more, important. The only problem this setup faces is that it can be quite noisy at full chaps due to the use of high-static pressure fans – without them, a high fin density radiator will perform poorly.
I will always opt to go with more fins per inch and invest in static pressure cooling fans when overclocking as they provide a more superior cooling efficiency.
The hard thing about getting a solid, liquid cooling radiator is there are not many that provide both size and high fin density. This is partly down to consumer pressures to deliver quiet systems. Only a small minority of the community will put up with rocket engine case fans.
Hardware Lab’s Black Ice series has gained immense popularity over the years, consistently performing time and time again. Apart from the non-SR1, the entire line comes with fin density in the 20 – 30 range and performs extremely well when coupled with high-pressure fans, but as previously mentioned, it can be quite loud when really pushing your overclocks.
Top Tip: If noise is a huge issue for you, then Alphacool’s NexXxos radiators are solid performers and reasonably quiet also due to their lower fin density, they also come in a variety of sizes and thicknesses.
The following watercooling radiators are solid choices, I have ordered them according to thermal performance – either way they are all solid radiators.
- Hardware Labs Black Ice GTX M160 – 20 FPI
- Hardware Labs Black Ice GT Stealth 240 – 30 FPI
- Alphacool NexXxoS XT45 – 10 FPI
Reservoir
Watercooling reservoirs are available in a few options.
- Drive Bay Mounted
- Tubular
- T-line
Drive Bay Reservoirs
Drive bay reservoirs have been around for years and are very simple to install and use. They can either come with a mounting bracket to attach your pump or simply with two bars.
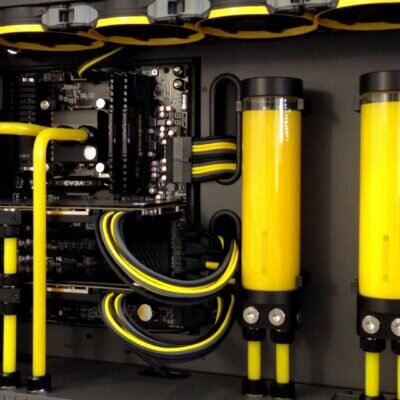
Tubular Reservoirs
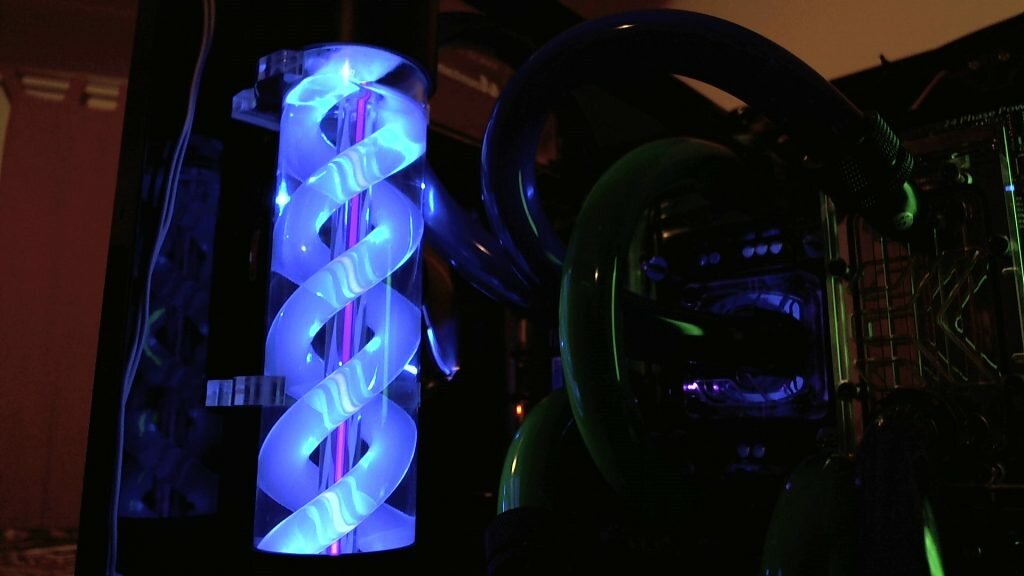
Tubular reservoirs have grown in popularity over the past few years. They are simple to install and often have kits available, allowing them to be directly attached to your pump and provide great hydraulic pressure. Best of all, they look absolutely amazing, especially when combined with some Mayhem’s Aurora coolant.
T-Line
While a t-line is not strictly a reservoir, A T-line by-passes the need for a reservoir but can be quite tricky for a newbie to bleed the system.
What Type of Reservoir is Best?
I only use a T-line exclusively on my overclocking and benchmarking loop. It keeps things clutter-free; however, it entirely depends on space and your preferences for a regular build. You cannot go wrong with either; make sure you have enough space to opt for a tubular variety.
Tubing
Things soon get confusing when it comes to tubing, especially if you are new to PC water cooling. First off, there are many different dimensions with various inner and outer diameters. Once you know the diameter you will be using, you have to choose between acrylic and flexible tubing; both have their advantages and disadvantages, so choose wisely.
If you are a beginner and this will be your first build, go with flexible tubing the first time around. It is a lot more forgiving if you make a mistake.
If you are a beginner and this will be your first build, go with flexible tubing the first time around, as it is a lot more forgiving if you make a mistake.
No matter which tube diameter you decide to go for, your end choice will not affect your loop’s overall performance or temperature.
Radiator Fans
While you cannot cool anything beyond ambient case temperature without using sub-zero cooling methods, having solid fans that provide enough static pressure will help keep temperatures under control when pushing the boundaries.
Standard case fans will keep your components reasonably cool at idle, but any pressure and heat will start to build up in the loop resulting in high temperatures after prolonged use.
The only downside of using a high-CFM fan is noise. As more air is passing through the fins, it is natural for more noise to be produced; as long as you have a fan controller, it should not be a huge issue.
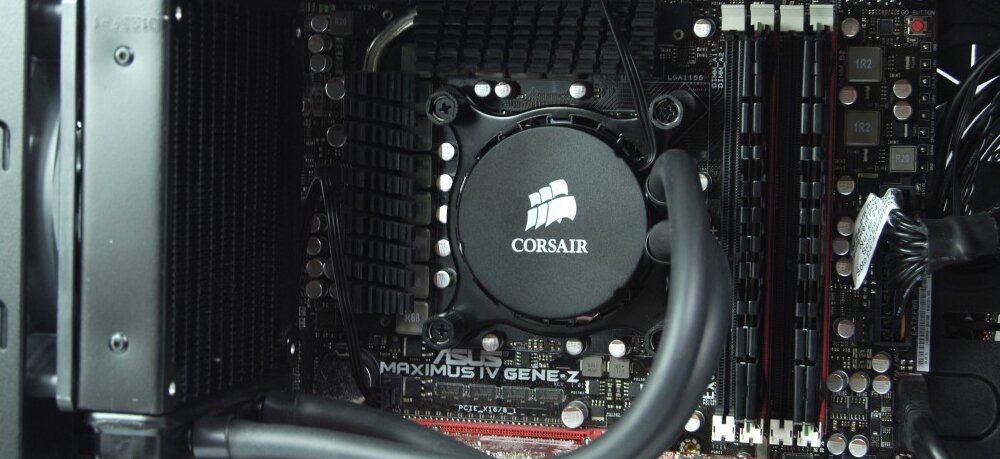
A great high static pressure fan that is readily available and look great is Corsair’s 120mm and 140mm SP Range. They are shipped with all of Corsair’s AIO Hydro coolers, and I use them on all of my daily systems.
If you don’t care about noise then definitely check out Delta fans, they provide unprecedented performance with some pushing upto 190CFM! they are noisy at full-chaps cranking out 48Dba but grab a fan controller and you will do fine, they really are the best fan money can buy for any serious overclocker.
Fixtures
There are two types of fixture or ‘barb’.
Compression fitting
A compression fitting provides a smoother build process and looks much nicer; however, if you fiddle around too much in your case, they can come loose and leak. That does not mean they are not safe; you have to take more care when building your system, making sure all connections are as tight as they can be.
Compression fittings are my go-to choice for water-cooling builds. If you have a small case where build space is limited, angled compression fittings can make the whole process easier and much cleaner.
Standard Jubilee Barb
The second type of barb is your standard affair, where the tubing slides over the end and is fastened into place using jubilee clips. As a beginner, this is how I started to reduce points of failure and the potential for leaks. You can get them really tight, making it nearly impossible for any water to leak unless you didn’t screw in the barb tight enough.
Top Tip Generally speaking, each section in the loop will require two barbs, an inlet, and an outlet. However, sometimes pumps come with moulded cases that already have barbs for you to use.
Cooling Fluids
The cheapest water cooling fluid around (and best) is osmosis or distilled water. You cannot just use it straight from the tap because of the high mineral content.
For flexible tubing systems, you must use distilled water and treat the water with a solution that neutralizes the Ph level or even use a silver kill coil that kills bacteria. It keeps the loop free of gunk and performing at its peak.
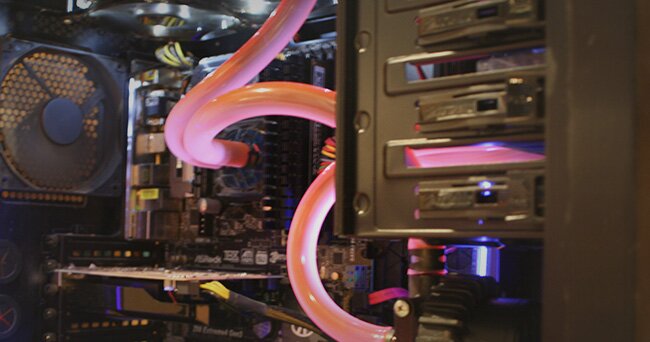
If you want your liquid cooling loop to glow under UV cathode lighting, then buy tubing that is already pre-coloured and UV treated; it will not fade and will always look vibrant
For people building with acrylic tubing, it is safe to use the huge range of fluids that are premixed with colorants. The hard polymers in the acrylic tubing most colorants in the tubing do not damage the tubing.
Custom Watercooling Build Tips
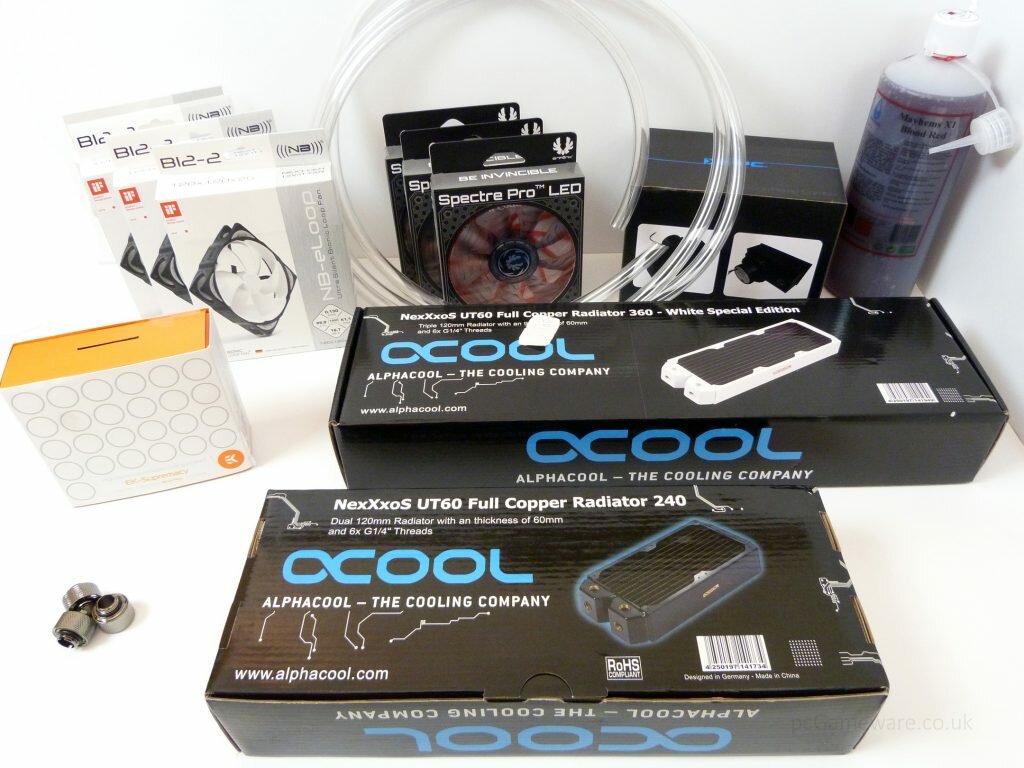
So your parts have arrived, and its build-time, but where do you start? Let’s run through the checklist; if there is anything you do not have, go to your local hardware store to try to source the parts or order them online! It means a delayed build but will be worth it. After all, you can’t build anything if you forgot a vital PC water-cooling component.
Custom Build Checklist
Everything marked with an asterisk is optional.
- CPU / GPU* / RAM Blocks*
- Water Pump
- Reservoir
- Tubing
- Appropriate number of barbs
- Tubing clips if your are not using compression fittings
- Mole grips
- Screwdrivers
- Flexi-tube cutter
- Thermal Paste such as Artic Silver 5
If you mentally checked yes to all of the above, let’s get started.
1. Watercooling Loop Order
One of the most asked questions, even amongst the pros, is what the best water cooling loop order is? The truth is that temperatures throughout the loop will only vary +/- 1*c at any one time and will not make or break a record-breaking overclock. My advice has always been to set it up however it looks best with one exception –
The only requirement when you are constructing your loop is to make sure the reservoir is feeding the pump (and positioned above); it will make bleeding the system easier, but it will prolong the life of the pump.
A dry pump is a dead pump!
2. Leak Testing
Leak testing may seem like a tedious, unnecessary step. After all, you fastened up your compression fittings or jubilee clips as tight as they will go – “It can’t possibly leak” but trust me when I say those are the famous last words.
When you first build the loop, do it inside the case. Then once completed remove all the components and use the paper clip PSU trick to get the water pump running directly without anything else plugged in.
Even after you leak-tested and put your components in, it is always wise to monitor the situation, pad barbs and the top of the graphics cards with kitchen paper and make sure no further leaks have appeared. When moving tubing around, sometimes it can dislodge the barb and make it loose, resulting in a small leak that gets worse and worse – be safe and double-check everything.
3. Do things up tight but don’t overdo it!
A mistake plenty of people have made before and only applies to leucite top cooling blocks and reservoirs.
If you over tighten your barbs, there is a huge possibility that you may end up cracking your CPU block or reservoir. It is easily done, so take your time.
When using compression fittings, remember to allow some when you are securing your tubes into place. As you tighten them up, the barbs will slightly tighten as well.
4. Use the correct screws for your radiator
Using the correct screws is so important when fixing your fans onto your radiator. If the screws are too long, its possible to puncture the radiator and cause a leak.
Many manufacturers have moved cooling lines further in as well as putting blanking plates below the screws to stop this from happening. Still, if you are on a budget, many radiators do not factor this into their design.
5. Don’t neglect case airflow
Never underestimate the power and importance of quality airflow through the case. It does not just apply to people cooling on with air alone, but to us, the watercooler’s airflow is vital to keeping temperatures down and stable.
Even if you are cooling all the components in your case, they will still generate heat. Heat will build up in the case (and around your radiators), increasing the ambient case temperature and reducing your radiator’s cooling efficiency.
6. Take your time bleeding the system
Bleeding your water cooling system takes patience and can often be frustrating but getting every air bubble out of the loop. Still, it’s an essential step if you want consistent temperatures.
It’s not uncommon for there to be a +/- 10*c temperature difference between cores if there is air trapped in the loop or there is not enough (or too much) thermal compound.
There are a few tips that can help bleed your loop easier and reduce the beads of sweat accumulating on your brow. Bleeding your water loop does not have to be a stressful experience if you are pre-armed with some tips!
- Always make sure the reservoir is feeding the water-cooling pump and is not letting any air into the pump
- Turning the pump off and on periodically will allow the smaller bubbles to become bigger bubbles that help to flush through easier
- When the loop is 3/4 full, gently rock your PC case back and forth to dislodge air bubbles
- Squeezing the tubes and releasing helps build up extra pressure in the system, helping to flush it through
- Smile, it’s proven to release happy chemicals in our brain that combat stress!
Custom PC Watercooling: Putting it all together
Putting your custom PC water cooling loop together for the first time can seem like a daunting thing, but it is not and quite straightforward when you know how. As with all things, organization is the key.
Step One: Assemble Blocks & Add Fittings
Depending on what water block you brought, you may or may not have to construct it. My EKWB Supreme-HF come pre-constructed for me however, it did come with instructions so you can do it yourself just in case you need to clean it in the future.
When attaching your barbs, make sure they all include their rubber washers. Sometimes they go astray in the manufacturing process; if one is missing, the loop will spring a leak.
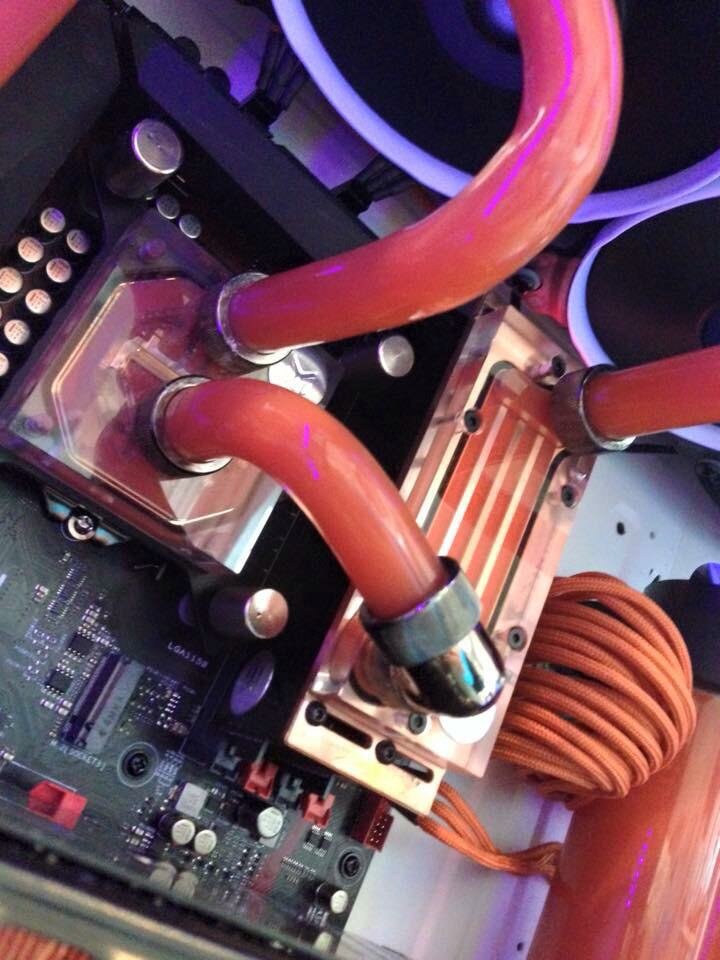
Step Two: Attach Cooling Blocks
Before rushing ahead and putting everything in the case, it’s always handy to attach the brackets and the CPU block to the motherboard (and other components, if applicable). Your knuckles do end up feeling the full extent of the cases wrath if you try to attach them when the motherboard is already mounted. It also allows you to evenly fasten the CPU block to the motherboard resulting in a perfect thermal compound application.
Step Three: Mount the Radiator
If you have a slimline radiator such as Hardware Labs Black-ice 2 stealth, this step is not as important. Still, if you have a really thick radiator, it can be fiddly to get the motherboard mounted, especially if you are mounting it on the inside top of your case.
Go ahead and get that bad boy mounted!
Step Four: Install the reservoir & Pump
Depending on what reservoir and pump you bought, they may or may not be combined. Your job is to get the pump and reservoir both secured into place, visually plan where your tubes will go and try not to have them extend across the case.
It reduces the flow in the system and takes longer for cool water to return to the CPU.
IMPORTANT! If you are using a 5’25 drive bay reservoir, make sure to leave yourself enough clearance to fill it up
Step Five: Install Components into the Case
With all the bulky stuff installed in the case, now is a great time to install all of your components, don’t worry about tubing; that is the next step!
Step Six: Cutting Tubing to Size and Fasten in Place
If you are using acrylic tubing, take your time. It is not forgiving if you cut your tubing too short not only do you waste money, but the immense time you spent heating and bending the tubing.
Step Seven: Bleed & Leak Test
Remember the tip before about how important leak testing is? I will say it just one more time – Don’t skip this step.
Remove your PC components out of the case and gently rest them on an anti-static bag on top of your motherboard box for now. Fill up the reservoir and use the paperclip trick to start the pump; remember to keep the reservoir high in the loop and make sure no air enters the loop.
You may need to turn the pump on and off a few times to force air through the system, and it allows all the smaller bubbles to accumulate into bigger bubbles allowing them to pass through the loop easier.
When the pump stops making a gurgling sound, the water-cooling loop is full, but it still helps to rock the case gently to move any stubborn bubbles.
Step Eight: Final Build
So 24 hours have passed, and no leaks have sprung. Great news! You can now put your PC components back into your case, add thermal compound to the CPU and secure the block in place.
Remember, even after you have leak tested and put your components in, it is always wise to monitor the situation for an hour.
Ensure all your barbs are tight and not freely moving around. It’s still possible to dislodge barbs.
Take Home
There is a lot to learn initially when your start out water cooling but once you have done it once it’s easy to do it again. With the above PC water cooling guide you should now know enough to go and build you’re own just remember:
- Research, research, research – it will pay off in the end
- Only use distilled water in flexi-tubing systems
- Never skip leak testing
- Don’t mix different metals in the watercooling loop
- Strike the right balance between radiator FPI and size
- Take your time, don’t rush
Do you think I missed something out of this custom water cooling guide? Let me know in the comments, and I will make sure I get it amended right away.
Don’t forget to come and show off your custom water cooling builds in the comments section below.
isnt this jaystwocents computer thats called SKUNKWORKS ???
Water cooling is better for a 24/7 rig as long as any radiators are outside the case as it more effectively moves heat away from all the components. Decent cooling is important for the vrms and northbridge as they will quickly degrade without, stock coolers cool these parts along with the CPU.
Air cooling with top quality heatsinks is better for over clocking rigs that are not housed inside a case as they can remove heat into the air instantly without relying on a pump.