How to DIY RGB Lighting with an Arduino & WLED
DIY RGB lighting using WLED is a great way to save some money. For a fraction of the cost for Corsair’s ICUE hardware, you could create your own programmable lighting effects with nothing but an Arduino, some wires, a 5v power supply, a soldering iron and a little bit of patience.
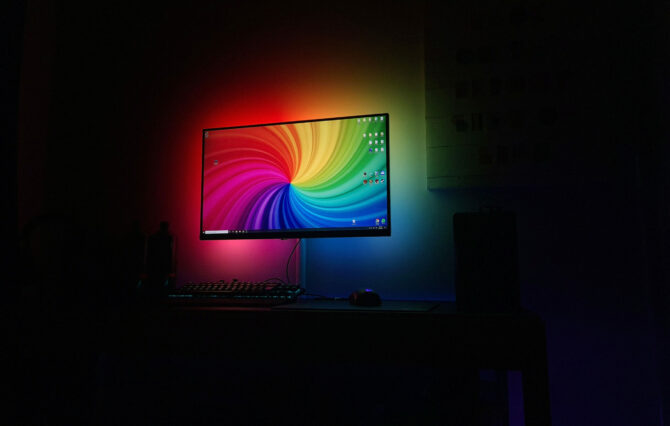
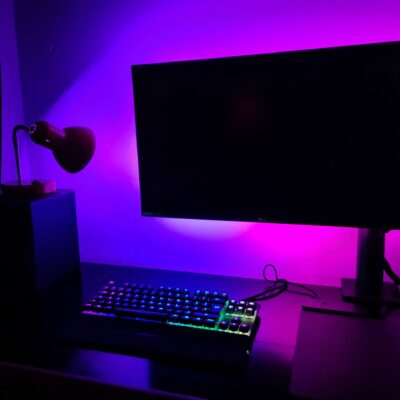
WLED is powerful software, giving you control over colour, hue and even custom animations. It’s even possible to DIY Ambilight for your gaming pc using the same hardware and some screen grabbing software, but that’s for a later article, I’ve already got it installed around my pc screen, but it needs some tinkering. Leave a comment if its something you would like to see.
Table of Contents
So, without further ado – let’s get cracking.
What is an Arduino?
Arduino is an open-source platform for rapid electronic prototyping. It can run code like a computer, but instead of running many programs at once, an Arduino can only run one. They come with a limited (but usable) amount of memory that can be used to program anything from robots, irrigation systems, warning systems, and simple LED strip lights.
What is WLED Software?
WLED is free, open-source software (we like open-source) that lets you control addressable RGB lighting strips from your mobile phone.
A fast and feature-rich implementation of an ESP8266/ESP32 webserver to control NeoPixel (WS2812B, WS2811, SK6812) LEDs or also SPI based chipsets like the WS2801 and APA102!
From solid colours to full-blown synchronised rainbows across your entire setup – WLED is a really robust software solution for DIY enthusiasts. What’s great about WLED is it has an almost one-click installer for the Arduino and comes with Applications already published on both Android and Apple Store that will control every aspect of your lighting.
- Supports Alexa Voice Commands
- Syncs with Phillips Hue
- 100+ preset animations
- Adalight (PC Ambilight)
- Hyperion Support
- RGBW(W) Support
What do I need?
All of the hardware you will need to build your own RGB gaming setup is below. I implore you not to get put off by software or soldering; it’s really not that hard to solder on the few small bits needed to get up and going.
Bonus: RGB Lighting Guide for Gamers
This was the first RGB lighting project that I had ever used a soldering iron, and I’m thrilled I took the time to pick up the skill. It took all of a couple of hours and opened up a world of possibilities with different build idea’s. If you don’t want to solder, I would recommend buying a premade led strip kit instead. However, it won’t be compatible with this guide.
Hardware Required
330ohm ResistorMany people do just fine running the circuit without the resistor, especially on shorter lengths however, at longer lengths of 180+ LEDs, you will like need this installed.
| Item | Description | |
|---|---|---|
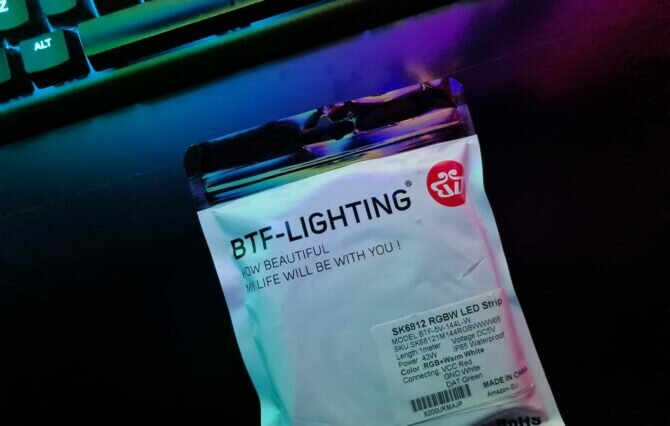
| 1 meter WS2812 – 144 led per meter | WS2812B are plain RGB strips while the SK6812 have a separate white diode. I opted for the BTF Lighting SK6812 which gave me control over pastel colours and a wider range of hues | Link |
| Wemos D1 Mini ESP8266 | ESP8266 based Arduino development board. It comes with onboard USB and wireless and saves us having to solder these components separately. | Link |
| 20awg LED Wire | Some quality 20AWG Led wire will save you a lot of headaches down the line as you gain confidence setting up, inevitably you are going to start using longer lengths. | Link |
| 1000uf Capacitor | It’s recommended to bridge the 5v input terminals to protect the leds and arduino against power spikes when the power source is first turned on | Link |
| Breadboard | A breadboard is generally used for prototyping however, I’m still using mine to power my lights. Its handy to have one just in case, it makes the initial setup and testing really easy. | Link |
| Breadboard Wires | While you will only need to use one or two, you can never have enough of them around. | Link |
| 5v power supply | Amperage will be determined by how many LEDs you wish to run, the formula for figuring this out is below. | Link |
| Soldering Iron | You will need an adjustable soldering iron capable of soldering around 400f. I have linked the exact kit I am currently using and it’s serving great for hobbyist soldering. | Link |
Note: The Wemos D1 mini is a tiny Arduino board coming with USB and Wireless. It’s perfect for our application. If you cannot find a Wemos D1 Mini, any ESP8266 with integrated USB and wireless will do the trick.
Wiring Diagram
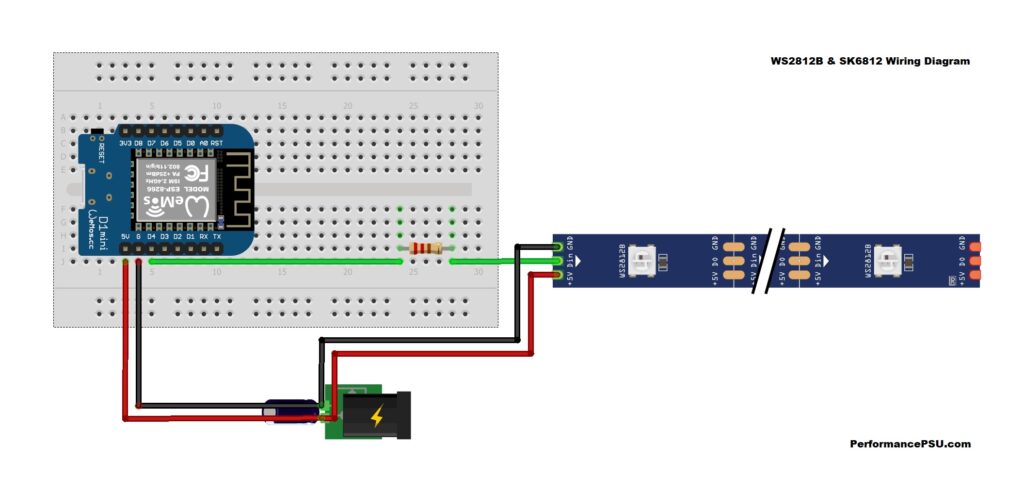
I built the circuit using a breadboard which I have stuck to the back of my pc screen. I built upon this project and installed 1.5 meters of the LED strip behind my TV.
PRO TIP: If you have flickering LEDs using SK6812 LED (I have no issues with the ones from BTF lighting strips, remove the 330ohm resistor as it can mess with the 3.3v signal being sent from the Wemos D1 mini. In most cases, you will be ok.
I plan to rebuild the circuit with a level shifter to convert the 3.3v logic into 5v logic, but I have it working as intended and didn’t want to confuse things.
Calculating your power usage
If you plan on running 10 LEDs or less, you can get away with just using the USB cable via the Arduino and remove the 5v adapter from the wiring diagram; however, if you are planning or running more than 10, you are going to need an external power source, the question is – how much?
How to calculate led strip power draw
Each led consumes around 50mA each, which means for a strip of 30 5v LEDs, you would need a power supply of around 2amps. At their peak brightness, they will draw around 1.5amp combined.
- Count how many leds you will be using
- Calculate how many milliamps you will draw
- Divide the milliamps by 1000 to get amp draw
50 milliamp * 30 led modules === 1500 milliamps
1500 milliamps / 1000 === 1.5amps
How to install WLED on an Arduino to control addressable RGB lights wirelessly
Getting started is really easy and takes around an hour to solder everything together, install software and get up and running. I will assume you have no prior experience and explain how to create your own RGB lighting using off the shelf RGB led strips.
1. Install Wemos D1 Drivers
Before we can interface with our controller, we need to install the drivers so Windows and the Pyflasher software can communicate with the device and upload our code. Select the operating system you are running, install the downloaded file and move on to the next step.
Wemos Driver Download Page
2. Download Pyflasher
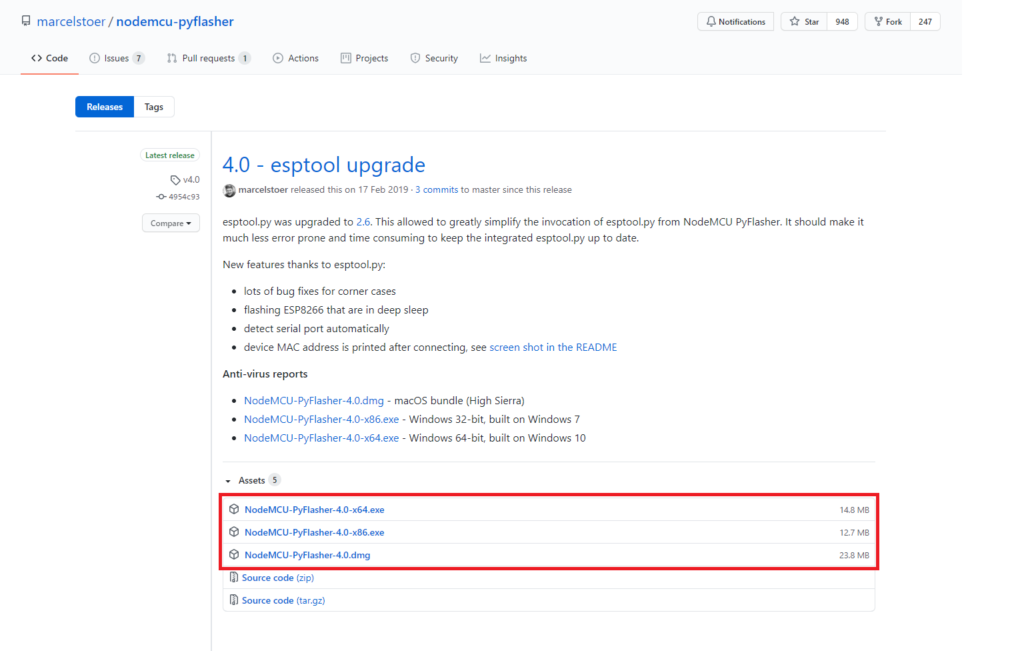
Pyflasher will allow us to connect to our ESP8266 development board and install the WLED software on our Arduino. It requires no installation on your machine at all. Again, select the operating system you are running, except this time, move the exe file to your desktop for easy use later.
Pyflasher Downloads
3. Download WLED
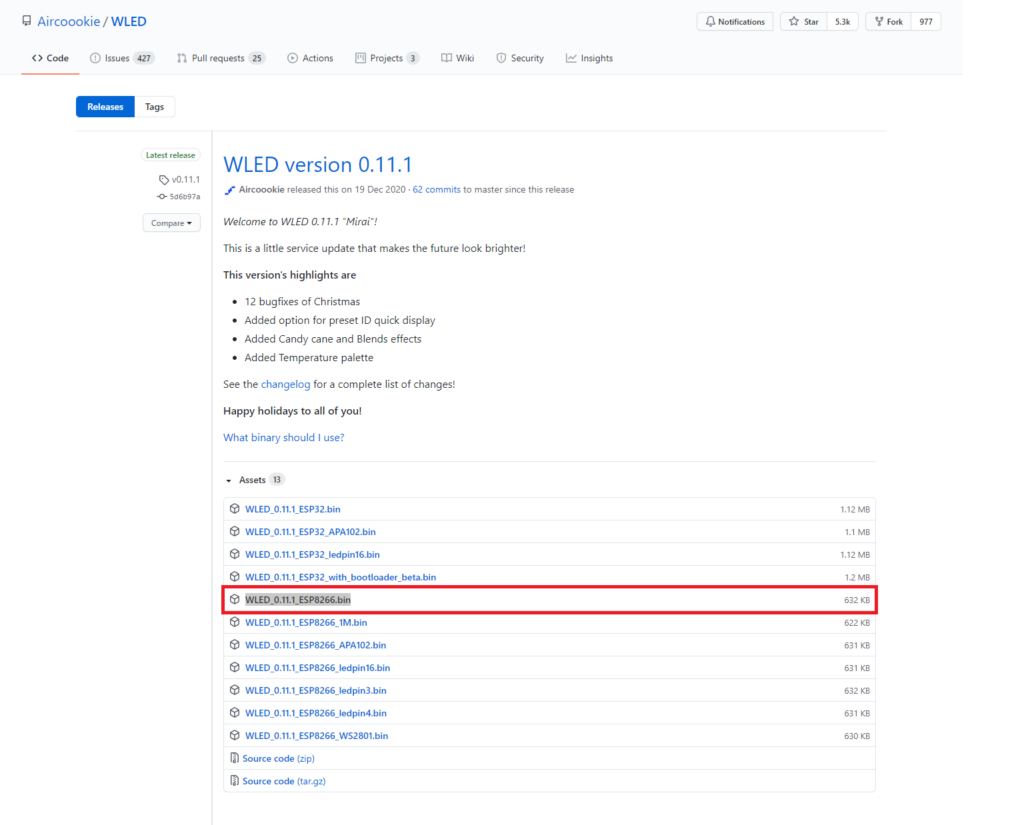
There are several versions to download for WLED, but there is only one we need for our device. WLED_x.xx.x_ESP8266.bin. I have included a screenshot, so you cant make a mistake. Replace the x.xx.x with their current version.
WLED Releases on GitHub
4.Flash WLED onto the Arduino
Disconnect any external power sources before starting this step. If you plugin the 5v power to the Arduino whole also using the USB, you will fry the board. Start by plugging your Arduino in a spare USB slot and open up NodeMCU-Pyflasher.exe from your desktop.
- From the serial port dropdown select the serial port your device is on. Don’t worry if you don’t know, you can try the auto-detect setting
- Under ‘NodeMCU firmware’ click browse and select the
WLED_x.xx.x_ESP8266.binfile - Don’t worry about the rest of the settings, hit Flash NodeMCU and sit back and relax.
- Once the flashing process is complete, unplug the Arduino and plug it back into reset
- Grab a WiFi enabled device such as your phone or computer and move on to the next step.
6. Connect to the new device over WiFi to configure
I run wired LAN cables on all my computers so I had to use my mobile phone instead. The rest of the process is really simple and will only take a few minutes to get going.
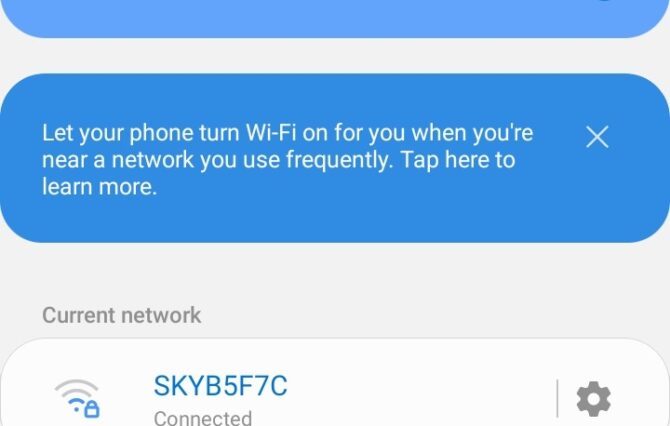


- Go to your wireless settings and look for a network called WLED-AP and connect
- It will either pop up automatically with an overlay allowing you to interface with your WLED enabled Arduino otherwise it will say this network requires sign in, click on the wireless network to proceed
- Click on ‘Wifi Settings’
- Enter your network SSID and password
- Hit save
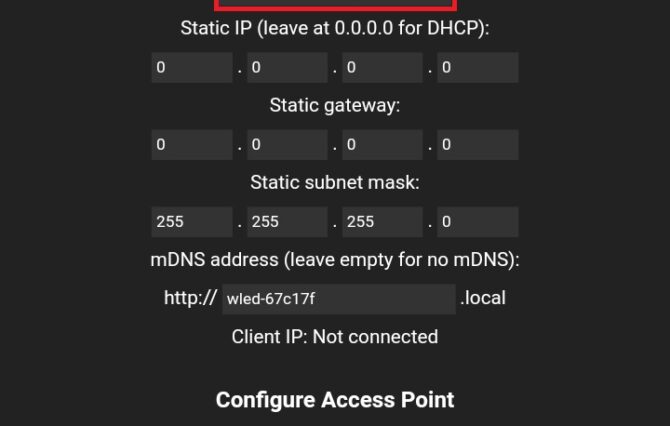
The access point will shut down on the final step, and you won’t be able to use it anymore; however, it’s now connected it’s self to your WiFi and can be accessed via the WLED application.
7. Install the WLED Mobile Application and Connect
All that is left to do now is install the WLED mobile application, which will automatically discover any lights on the network and control all their features from your mobile device.

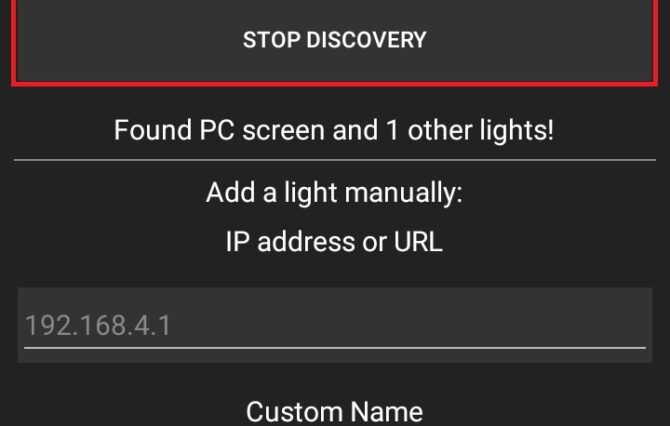

- Download the WLED App from the
- Click on the plus button at the top of the app
- Press Discover Lights
- Enjoy cool RBG effects
What can you do from here?
WLED provides many open protocols to communicate with different platforms such as Phillips hue, Google Assistant, Amazon Alexa, and a bunch of other protocols giving you plenty of ways to integrate the lights with your existing smart home hardware. Someone even created an application to sync your Logitech gear with WLED as well
How did you get on? What else would you like to see us build? let us know in the comments